Oraloa Diamond Painting Kits offer a world of creativity and artistic expression. Each kit comes with a color chart that serves as a key to guide you through the process of placing the resin diamonds onto the canvas. Understanding the color chart is essential for a smooth and enjoyable diamond painting experience. In this blog post, we'll provide you with a comprehensive guide on how to decode and navigate the color chart on Oraloa diamond painting kits, helping you bring your masterpiece to life.
-
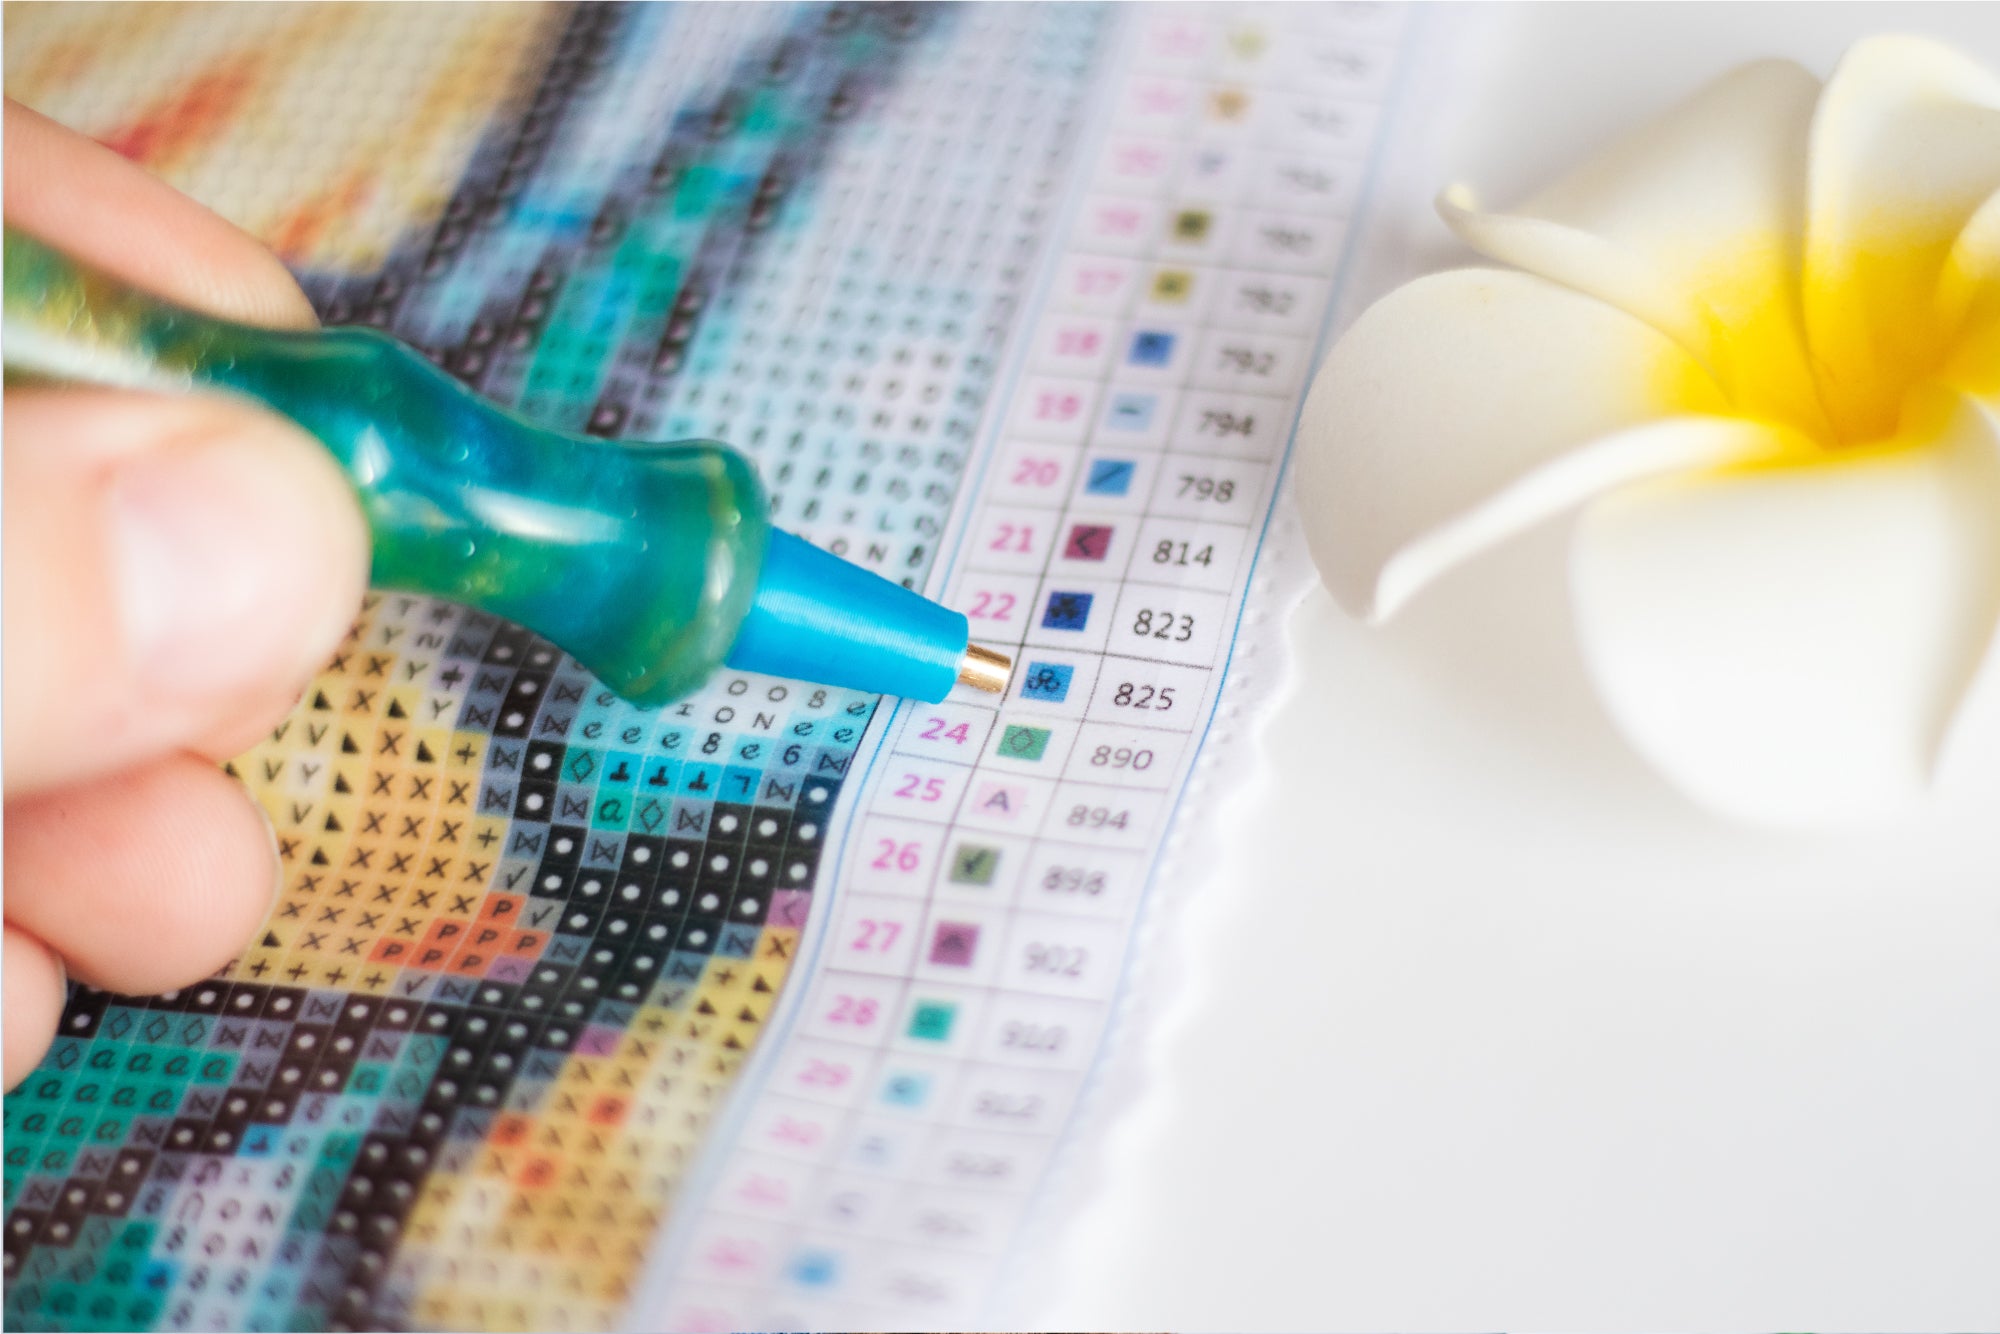
Color Identification: The color chart consists of various symbols or codes that correspond to different colors of resin diamonds. Each symbol represents a specific color, allowing you to easily identify and locate the corresponding diamonds on the canvas. Pay attention to the shape, size, and details of the symbols, as they may vary between kits.
-
Color Code Legend: The color chart is accompanied by a color code legend or key, usually located at the top or bottom of the chart. This legend provides a reference to the symbol, color name, and corresponding color code or number. Familiarize yourself with this legend to ensure accurate identification of colors during the diamond painting process.
-
Grid System: The color chart is often divided into a grid system, with rows and columns labeled with numbers and letters. This grid system helps you easily locate specific symbols and colors on the chart. The numbers typically represent the column, while the letters represent the row. For example, A1 refers to the symbol or color in the first column and first row of the chart.
-
Diamond Placement: To begin your diamond painting, refer to the color chart and locate the symbol or color you want to work with. Once identified, find the corresponding symbol or color-coded area on the canvas. The symbol or color-coded areas on the canvas align with the symbols on the color chart, indicating where to place the corresponding diamonds.
-
Organization and Storage: Organize your diamonds according to the color chart to streamline the diamond painting process. Sort the diamonds by color and place them in separate containers or trays. Label each container or tray with the corresponding color code or number to easily identify and access the diamonds as you work.
-
Double-Check and Cross-Reference: As you progress with your diamond painting, periodically double-check your color chart to ensure accuracy. Cross-reference the symbols and colors on the canvas with the chart to confirm that you're placing the correct diamonds in the designated areas. This helps prevent any mistakes or inconsistencies in the final artwork.
Understanding the color chart is key to successfully completing your Oraloa Diamond Painting Kit. By familiarizing yourself with the color identification, color code legend, grid system, and diamond placement process, you'll be able to navigate the color chart with confidence and precision. Take your time, stay organized, and enjoy the journey of bringing your masterpiece to life. Let the color chart be your guide as you immerse yourself in the captivating world of diamond painting.